Paper mache Bobblehead halloween costume

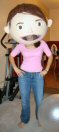
Our paper mache Bobblehead halloween costumes were the best halloween costumes EVER! About 40 hours of work, several weeks worth of newspapers, 2 giant balloons, 20 little bottles of paint, 5 lbs of flour and some hot glue make a pretty good costume! More details and pics inside!
We got the idea after seeing some guy in a giant Ichiro bobble-head costume on Ichiro bobble head day at a Mariners game. He was wearing a giant one that looked awesome!
I spent a LOT of time and made a huge mess doing the mache. We used some giant balloons to do the head, and around 6-10 layers of mache on the whole thing. We had one minor/major problem, though. Since the balloon was so big, we had some problems with the size of the balloon changing with the heat in the house. During the day when it got a little warmer inside, they expanded a little. This is where the problem starts! Since part of the balloon was still wet, the dry part did not expand, and kept the balloon in the round shape there. But the wet part of the balloon stretched out to allow for the expansion of the balloon! So they would have one weakspot that stuck out and made a goofy bubble. we had to let some air out of the balloon, get the stretched part wet with mache, and smooth it back down. I even popped one of the balloons inside by accident, so i had to blow up another one inside the partially dried shell and then continued mache’ing over the original shape.
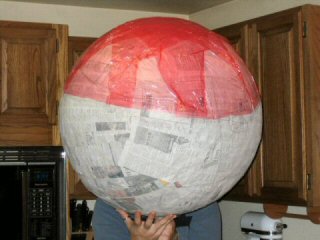
The first picture i have of the mache process is this one, where i’ve put plastic wrap on the top part so that i can add a removable hat made of mache that will fit perfectly. It is also the first pic that gives you a good sense of scale, with me holding it up in front of my body.
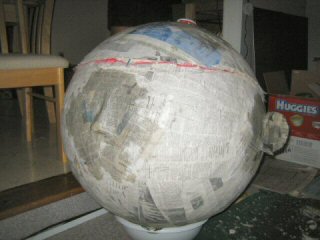
Here you can see the ears mostly done, and the nose in progress. The ears are cardboard from cereal boxes cut into the ear shape, with rolled up newspaper taped on to make the ridged shape. The ears had a flap edge that was then taped onto the head. Then the whole thing was mache’d over.
The nose is all paper. Newspaper folded into thicker paper, then folded to make that shape, taped on, them mache’d over.
You can also see the hat, mostly done. the hat layers are all there, as well as a button on the top made from lots of paper mached and shaped by using a cut down sour cream container to make sure it stayed round as it dried.
Note to mom: there is no “news” in this picture! The “huggies” box in the background is for one of laura’s projects: diaper cakes
After the heads were dry, we then started painting them. I hung them in the garage, and used a couple cans of white spray paint primer that we had around the house. Having a flesh colored spray paint would have been awesome, but we didn’t see any. We didn’t look real hard though! Its amazing how much spray paint a couple newspaper balls will soak up!
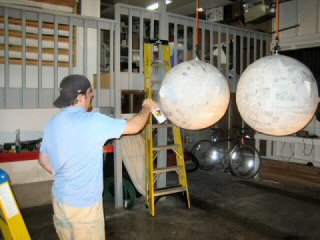
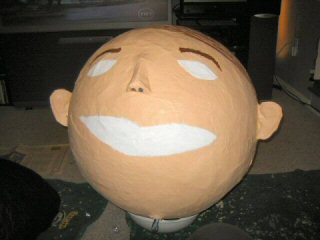
After priming, we then painted them with those tiny little bottles of acrylic paint you get at the craft store. We didn’t get any big bottles because we had no idea how much area the little ones would cover, and if the colors would be good. The skin tone colors we found turned out pretty good, though. The bottles seem to cover a large amount of area when you don’t need them to, and like 5 square inches when you only have one bottle! All in all i think we used about 20 bottles, many flesh/hair colors, and a handful of assorted other colors for eyes, lips.
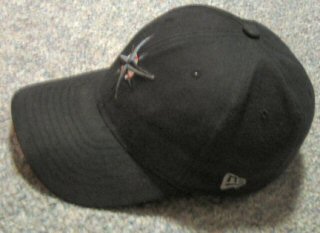
After painting up the heads, it was time to finish the hat. This is the original Mariner’s hat. The front has the M’s compass rose logo, but for some reason, the compass is printed at a slight angle though. The back has another compass rose overlayed on the with the Seattle “S”. The side has the new era flag logo on it.
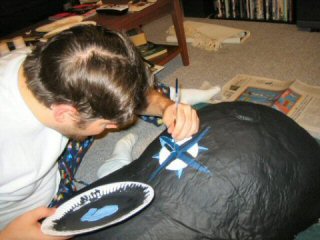
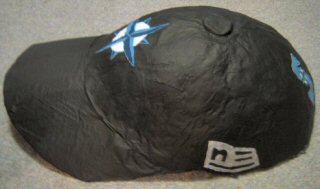
The hat is made from the paper mache’d base, then with a large piece of cardboard to make the rim. i got the cardboard wet with one layer of mache, then bent it and taped it to the base. I then put several layers of mache on the rim and the edge to make sure it became one big pice.
Painting the details of the hat were pretty complicated. It took me probably about 4 hours total to do the whole hat. And working with something that awkward shape and size, while sitting on the floor can be killer on your back!
The almost finished hat. This was before i did the red threads. With the red threads on the ball it looks pretty awesome.
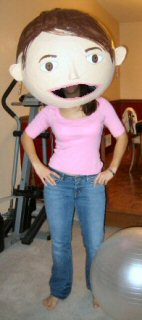
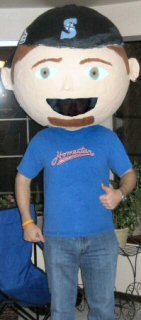
The finished products, complete with costumes!
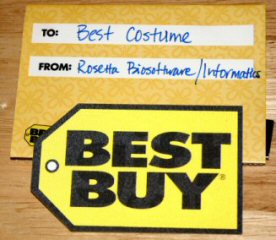
At work, as part of our annual halloween party, i won the prize for best costume! a $50 best buy gift cert! The best part was that most people didn’t know that the hat was removable. I had it on forwards for most of the party, and then took it off because it was getting heavy (and its impossible to drink a beer with that thing on your head!) When the prize part started, i had to put it back on, and this time i had the hat on forwards. At least one person remarked as i passed by, “Wasn’t the hat on the other way before?”
Categories: General